|
|
|
|
|
The easiest way to think of installing software on your PC is to compare it to buying a new VCR. The VCR comes packed up so you can transport it home. You then need to unpack it, decide where to put it, assemble all the bits and then plug in it. Finally, you clean up all the leftover packaging and ù hopefully ù read the documentation. This is exactly what happens with software and while programs come in several types they generally follow the same basic process. Thankfully, many of these steps are now automated so you donÆt have to tweak key files in order to install new programs. Before we start First, a quick lesson in file names and extensions: you may need to change a setting in Windows so you can see the full file names. First, open Explorer by selecting Start-Programs-Windows Explorer. If you're using Windows 95, select Options from the View menu and uncheck the box that says Hide MS-DOS file extensions for file types that are registered. Also select Show all files. If you're using Windows 98, select View-Folder Options, then click the View tab and uncheck Hide file extensions for known file types. Also select Show all file types. In file names, the three letters after the "." are called the extension. For example, a file called setup.exe, has an "exe" extension. If you havenÆt tuned off the hide extensions feature, this file name will appear only as "setup" (not "setup.exe"). Most installation programs are started by double-clicking on setup.exe or install.exe. If files are downloaded from the Internet they may have slightly more cryptic names. For example, the Acrobat Reader installation file is ar40eng.exe.
The installation process, step-by-step "Acrobat Reader" (ar40eng.exe) will be used as an example (it is available in the Essentials section on our cover CD). 1. Unpack the files. If you have downloaded the program from the Internet, the PC World CD or are running the program from a disc, the files need to be unpacked. More advanced programs automatically unpack themselves and then commence the installation. All you have to do is double-click on them. Alternatively, you can use Windows' Add/Remove programs feature, but this can be a little convoluted and confusing. Note: some installation files require you to unzip files manually (they have a .zip extension). For more information see "Unzipping". 2. Close files and agree to licence. The setup program may need to make changes to files, and this can't be done if they are currently in use. Programs that are running need to be closed so the alterations can be completed. You will also need to sign your life away by accepting the licence agreement. 3. Location of files. After unpacking, installation programs will ask you where you want to install the program. This is a little deceptive as many programs may add files to other folders. 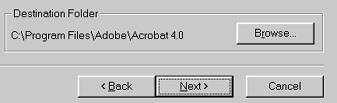
Caption: An installation routine will usually suggest a destination folder. 4. Great mysteries: the program installs itself After the basics are completed, the installation program will often check your system. It will also tweak settings, create Shortcuts and folders, copy files and God knows what else. Exactly what programs do at this stage can be perplexing or deliberately kept a secret (the VCR analogy is that a technician tells you to leave the room while he installs the VCR and when it's finished, he calls you back in!). 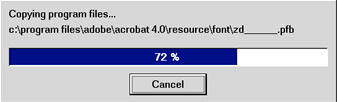
Caption: Installation programs may hint at what they're doing, 5. Clean up. Most installation programs delete the files that they unpacked when they are no longer needed (just like the box the VCR comes in). It is worthwhile checking the contents of the temporary folder after the installation (especially if you had problems) to make sure this was done. The most commonly used temporary folder is c:/windows/temp. 6. Finished. Generally at the end of the process you will get a message saying "Installation complete" and often you will need to restart your PC. Even if you are not required to restart, it is a good idea to do it anyway. It can be boring or a little confusing, but before running a program, ALWAYS look at the documentation, even if you donÆt read it all. You will often find a file called readme.txt; alternatively, look for a help file (it will have a .hlp extension). If all goes well, you should be able to see a Shortcut to your new application in your Start menu. Select this and your program should start. Hopefully, an "uninstall" Shortcut was also added. If not, most programs will appear in the Windows Control Panel Add/Remove Programs. To remove the program select its name and click the Add/Remove button. For more information about zipping, installing and uninstalling programs, see the Help Screen archive on the cover CD
Dealing with Zip files "Zip" files are collections of files packed up into an "archive" (a fancy term for "box"). The most common is "zip" and and these types of files will require a little extra work before you can install the program. While many installation programs will unzip themselves (also called unpacking or decompressing), then automatically run the installation program and delete the temporary files for you, Zip archives require you to perform these steps yourself. To unpack zipped files you will need to install an unzipping tool (such as WinZip 7 on this month's cover CD). Next open the Zip file by double-clicking on it. Look for a readme.txt or install.txt file and extract it and view the contents. This file should tell you how to install the software. If not (or if it is absent), select all the files and extract them to a temporary folder such as c:\tempzip. Now go to that folder and look for setup.exe or install.exe. Double-clicking on this should start the installation. After the installation is complete, delete the files in the tempzip folder. Caution: a small number of programs donÆt need to be installed. All you have to do is unzip them and they are ready to run. Deleting this type of file will also delete the program. - Scott Mendham |
Category:newbie Issue: August 1999 |
These Web pages are produced by Australian PC World © 1999 IDG Communications